Also, if you know how to make blogger do expandable post short-cuts without making it add "Read More" links to all previous posts, PLEASE let me know. It's been driving me crazy.
Asparagus and Sausage Risotto
Serves 2
1/2 cup arborio rice
2 - 3 cups chicken broth
1 TBS olive oil
1 large shallot, chopped fine
1 - 1 1/2 cup asparagus, steamed and chopped into 1" pieces
1 link pre-cooked chicken sausage, sliced thinly
1/4 cup frozen (or fresh) peas
1/4 cup white wine
1/4 cup grated parmesan cheese
1 TBS butter
a splash of light cream
salt and pepper to taste

1) Pour chicken broth into a small sauce pan. Bring to a simmer. Lower heat, but keep warm. We're going to be adding this to the risotto as we go along.
2) Heat oil in a medium sauce pan, over medium heat, until it shimmers.
3) Add shallots to the hot oil. You can use onions instead, if you'd line, but I'm starting to have this love affair with shallots because they have this delicious subtle sweetness to them.
Sauté until translucent.
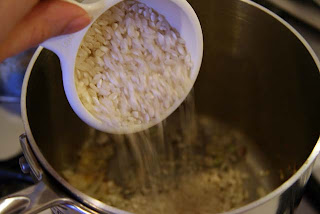
4) Add risotto to the pan. Stir until coated. This slows down the absorption process and gives the rice a slight nuttiness.
5) Add white wine to deglaze pan. Stir until most of the wine is absorbed. The rice should start to feel a little sticky.
6) Okay, now we're going to start adding the broth. I usually add the most at the beginning and then smaller amounts as we go along. I usually start with about a cup of broth.
Now we're going to start stirring. According to many risotto experts, one needs to be stirring "constantly." I usually stir more like "often." You do sort of need to hover near the stove and keep an eye on things, but you don't need to be stirring every second.
You want to keep your eye on the heat level. I usually leave it at this low simmer over medium to medium-low heat. You don't want the rice to absorb too quickly/boil off the liquid or it won't really cook right. And hey look, I'm not stirring!
This is what the rice will look like about 10 minutes in. See how it's starting to puff up and turn opaque? If you tried a grain right now it would be still mostly raw and kind of crunchy. You'll also notice there's very little "creaminess."
See how the liquid is being absorbed and starting to make the rice kind of creamy? You'll notice when you stir that the mixture will feel thicker and the rice will start to stick a little to the bottom and sides of the pan. Time to add more broth!
I added about 1/2 - scant 1 cup of broth. Depending on the brand of rice you get, you may need more broth, you may need less. Same deal if, say, you had the heat on too high when you started. So I usually try to keep an extra cup of broth handy. Hot water will work in a pinch.
Let's take another look at the risotto itself. We're not about 20-25 minutes into the cooking process. See how it's softer and we're starting to get that "creaminess" from the starch that's been released from the grains? Lets give it another stir...
Most of the liquid has been absorbed and there's more of that creaminess in the pot. If you try a bit now, it should be a little too "al dente" meaning almost tender, but with a bit too much of a crunch. Right now, we want it to be tender and firm, sure, but not crunchy. However, this point in time heralds the coming of additional ingredients!
*Trumpets Sound!*
Add another 1/2 cup of broth (sorry about the flash folks)
6) Time to add the asparagus...
... chicken sausage...
... and peas!
Now we stir it all together. Isn't all that green pretty? This is going to cook for another 5 -10 minutes. You'll need to be a little more active about stirring now because there's so much stuff going on in here. I usually add whatever last splash of broth I have leftover to this beautiful mess.
Let's get another close up. The rice is opaque, soft, and now, if you taste it, tender. It should still have a firmness to it, a bit of chew, but it shouldn't be crunchy. Now just watch the amount of liquid in the pan. You don't want risotto soup.
Ah, perfect. There's some liquid left, but it's thick and kind of creamy. Don't worry if it's not super "creamy." Much of that will come from adding the cheese and, well, cream.

7) Turn off the heat and add salt and pepper.
8) Now we add that tablespoon of butter. Stir until melted and incorporated.
9) Then we add the cheese. And stir. Now. We could stop here. It will be plenty creamy and delicious, but I just happened to have some cream sitting around, all lonely like, in my refrigerator, so why not.
So lets add a splash of cream. Like 1/2 tablespoon. You really don't need it. But it's tasty.
Isn't that just gorgeous? I want to eat it. Off of my screen.
And this, this here is what it's all about. Your final product? Dreamy, creamy, cheesy, risotto deliciousness.
10) Serve it up with an extra sprinkling of parmesan. Just for good luck.


1 comment:
this is gorgeous! the whole time i was adapting it for a vegan recipe in my head....if i try it i will let you know!
Post a Comment